Installation of RetSoft
After purchasing the software you have recieved an email containing the download links and license information of your purchase. We assume you have already correctly installed a scanner.
Attention! RetSoft Archive® can directly operate scanners that use the so-called 'TWAIN' standard. Please consult the manual that came with your scanner and make sure that your scanner supports TWAIN.
Download the installer from the customer portal and run it to install the software.
RetSoft Archive Business
Follow the steps of the installation procedure. When installing RetSoft Archive on a PC that is only to be used to search the archive, select the "Viewer" option. These stations do not work a version other than RetSoft Archive 'Pro' or 'Business' Refer to the license agreement for details. If the computer needs to restart after installing the software (the installer will notify you) please do so before starting RetSoft Archive.
RetSoft Archive Business+/RetSoft DMS Business
Follow the steps of the installation procedure. By default RetSoft Archive 'Expert' or 'Business+' will be installed into the folder "C:\Program Files\RetSoft\RetSoft Archive Expert". During the installation procedure another location can be specified if needed. If the computer needs to restart after installing the software (the installer will notify you) please do so before starting RetSoft Archive.
Before you can start using RetSoft Archive 'Expert' or 'Business+' a database needs to be created or selected. Information about setting up the database server can be found under the chapter RetSoft Admin. This chapter describes how to configure either a MySQL or an MS SQL Server database for use with RetSoft Archive. Basic database adminstration tasks, such as creating (or selecting) a database and user administration are explained in this chapter.
MySQL Server configuration
RetSoft Archive works with MySQL 5.7.x. You can find a short description of the installation and configuration for the database system below. The performance of RetSoft Archive depends heavily on the configuration of the DBMS and the performance of the server where the DBMS is installed.
We only support MySQL, and not forks like MariaDB or Percona Server etc.
Downloading, Installing and configuring MySQL
The first step is downloading the MySQL community edition (CE) installer. This installer package can be downloaded here
You must download MySQL Installer 5.7.x. (version 8 is not supported at the moment). We recommend downloading the complete installer (not the web installer) which has a size of about 350 MB.
Please note that it is not required to create an account for MySQL.com, you can use the option “No thanks, just start my download” when asked to create an account.
Open the installer after the download has finished. This installer allows you to install several MySQL products. The products you need to install are the following:
- MySQL Server (Version 5.7.x)
- MySQL Workbench (Version 6.3.x)
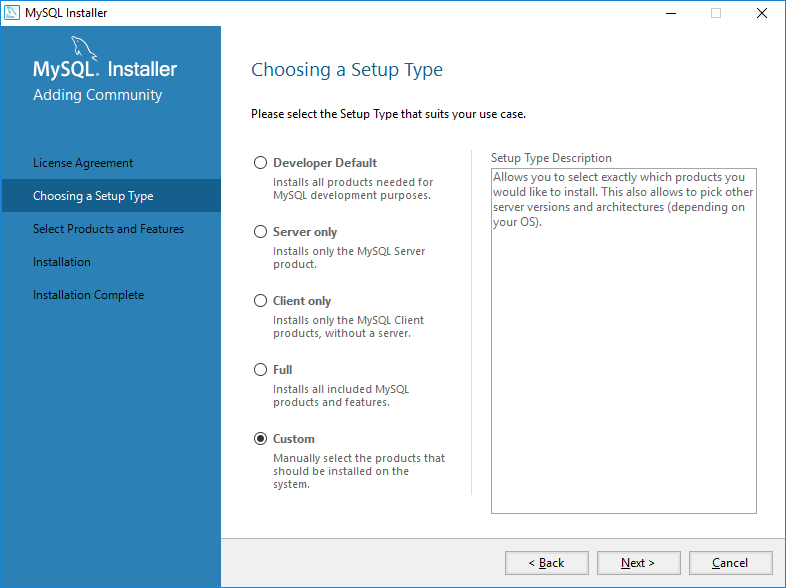
Select 'Custom' and click next.
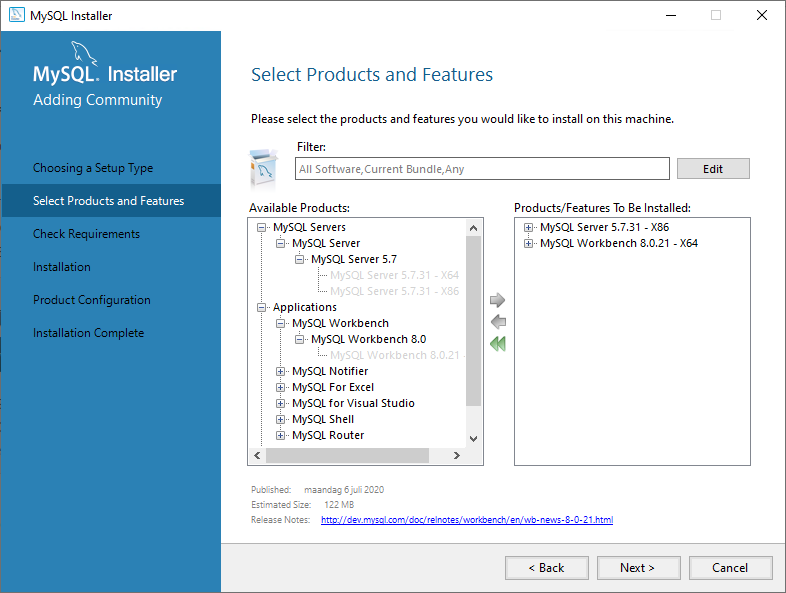
Select 'MySQL Servers' and proceed to select 'MySQL Server 5.7'. We support both X86 and X64.
Click the green arrow to add it to the list of products to be installed. Do the same for 'MySQL Workbench 6.3'.
In the product selection you can add both products by selecting a product and clicking the green arrow pointing to the right. After you've added both products to the install list select 'Next'.
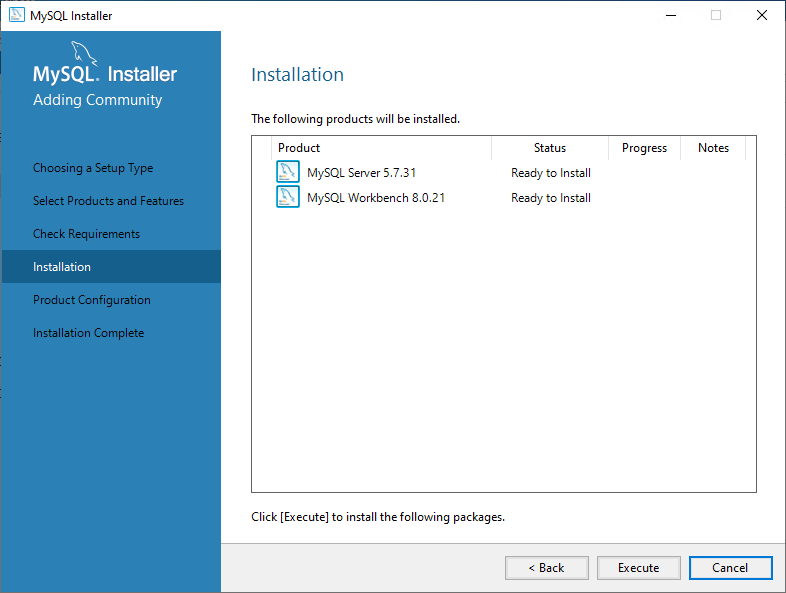
Select 'Execute' to start installing. When the installation is completed, click 'Next' until you see this screen. Once both products have finished installing the configuration part is next:
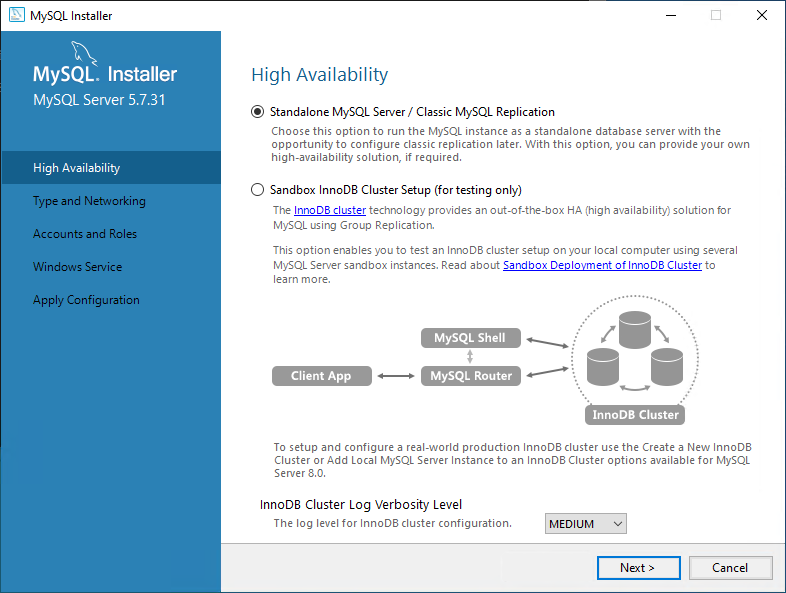
Leave the setting on 'Standalone MySQL Server / Classic MySQL Replication' and click 'Next'
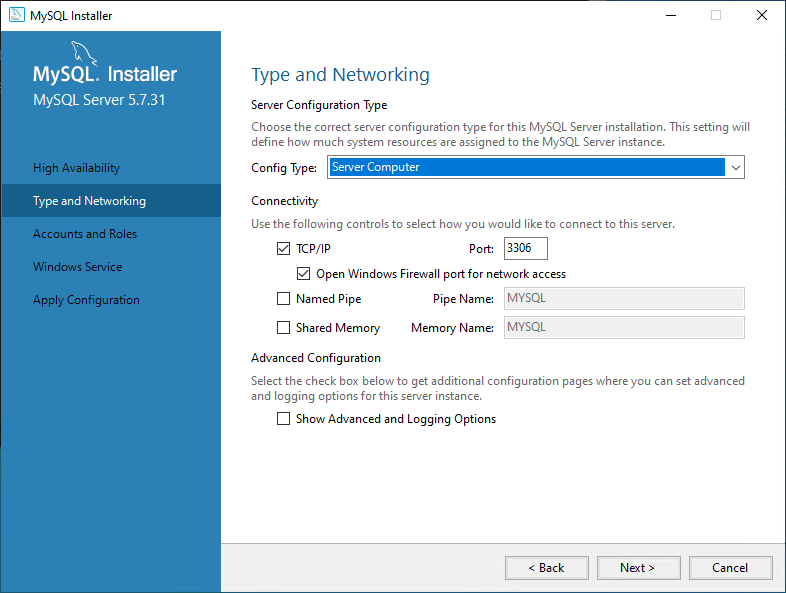
First MySQL Server will be configured. At the first tab, 'Type and Networking', make the following selection:
- Config Type: Server machine or Dedicated Machine
Verify the other settings, then press 'Next' to go to 'Accounts and Roles'.
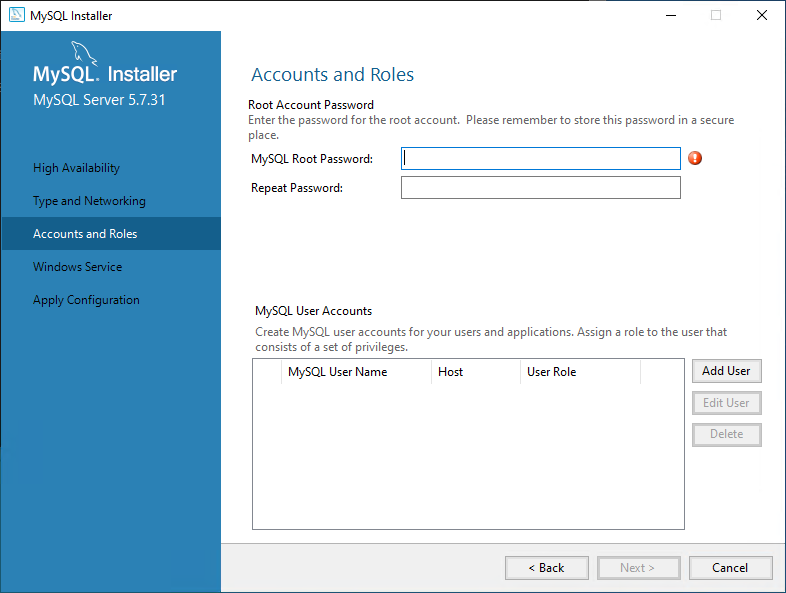
Here you can set a root password and add user accounts. Set up the root password to your personal preference, this is not important for RetSoft Archive, but make sure you remember the root password for future use.
After you have entered a root password, go to 'Add User' under MySQL User Accounts and add a user with the following credentials:
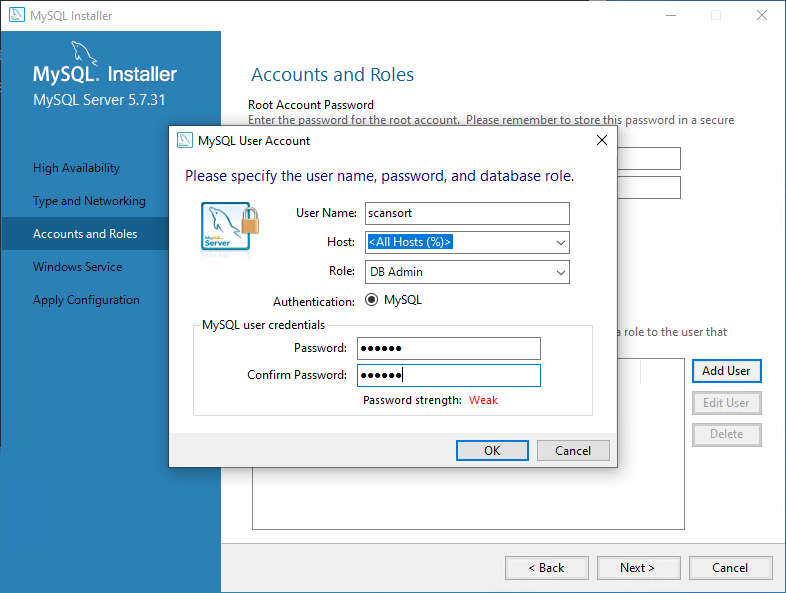
Username: scansort
Host: Any Host or All Hosts
Role: DB Admin
Password: ssxprt
NOTE: Throughout the documentation we are using a fixed password for the user account “scansort”. You can change the password to your own needs. Be sure to remember the password if you decide to change it. It is required to log into “RetSoft Archive – Admin”.
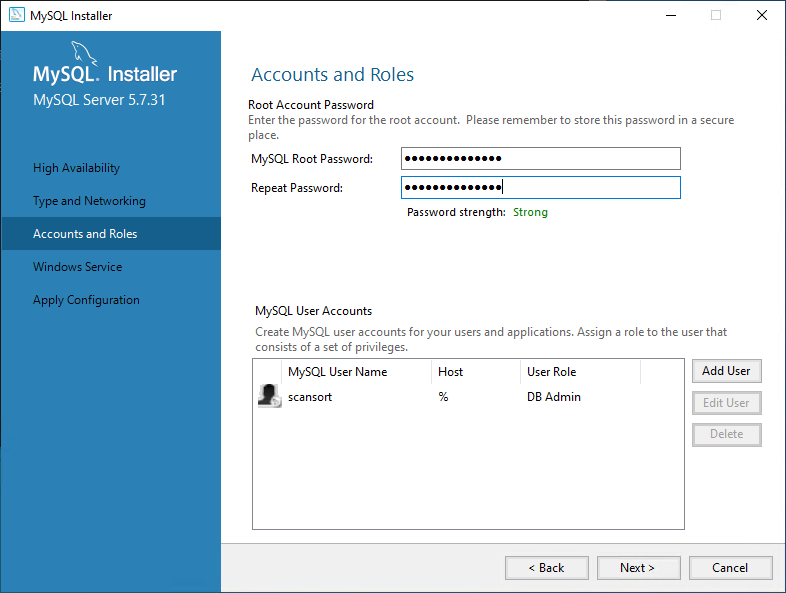
After adding this user, press 'Next' to go to the Windows Service tab.
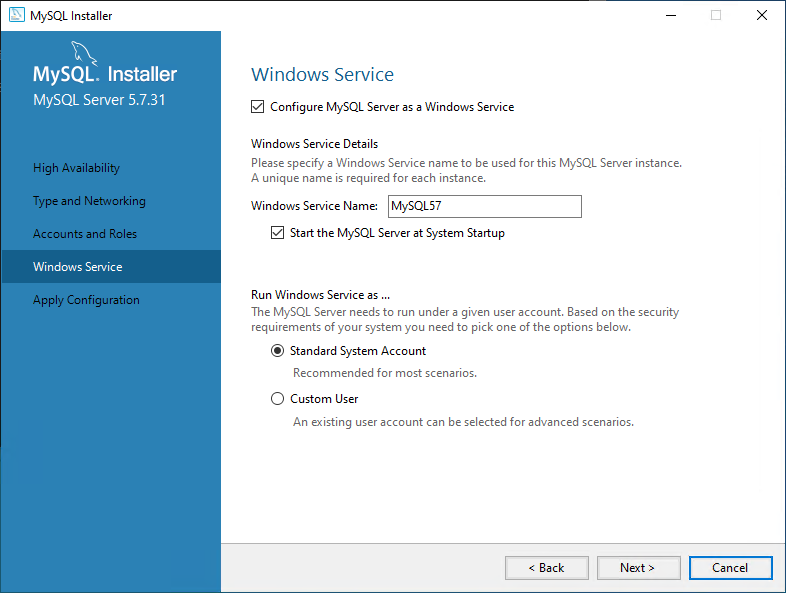
Here you can setup windows-related settings. Generally, leaving the default settings will be fine. Ask your system administrator if needed. Press 'Next' again to go to the 'Apply Server Configuration' screen.
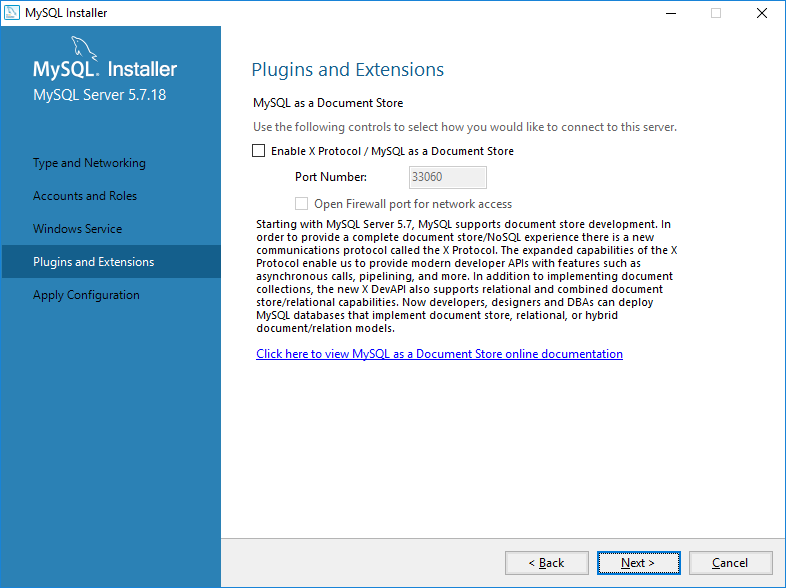
Don’t change the settings of 'Plugins and Extensions', but click 'Next' to continue.
Click 'Execute' at the 'Apply configuration' screen to apply all the settings you have just entered.
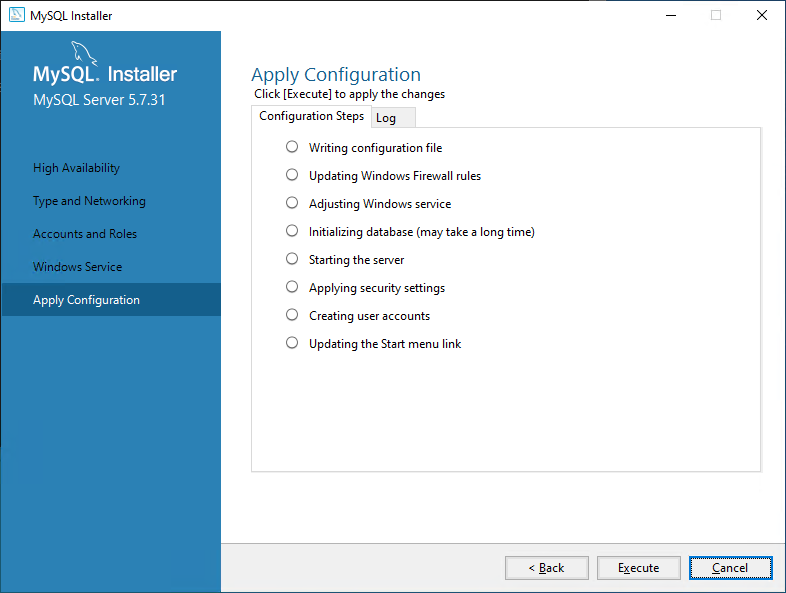
Press 'Finish' after the server configuration has been applied, and then 'Finish' again to close the installer.
Editing my.ini
Now we need to edit the 'my.ini' configuration file. This is located by default in the ProgramData directory:
C:\ProgramData\MySQL\MySQL Server 5.7
Open the file 'MY.INI'
First you will need to check if there is a line saying 'max_allowed_packet=4M'.If this line is present you can simple change it to 'max_allowed_packet=32M'.
If you have trouble saving the file, try the following steps:
- Open notepad as administrator
- Search notepad via the Start Menu of windows
- Right click the shortcut
- Choose 'Run as administrator'
- Open the 'My.ini' file via 'File' and then 'Open'
If you have trouble locating the my.ini file, try the following steps:
- Win+R (shortcut for 'run'), type services.msc, Enter
- You should find an entry like 'MySQL57', right click on it, select properties
- You should see something that looks like 'C:\Program Files\MySQL\MySQL Server 5.7\bin\mysqld' --defaults-file='C:\ProgramData\MySQL\MySQL Server 5.7\my.ini' MySQL57
- The path behind 'defaults-file=' should be the location of your my.ini file.
If this line 'max_allowed_packet' doesn't exist, you will need to do the following
Look for the following in this file:
[mysqld]
And under it add the following line:
max_allowed_packet=32M
So that it looks like:
[mysqld]
max_allowed_packet=32M
Finally, save and close this file. After restarting the MySQL service your installation should be properly installed and configured.
Your MySQL server is installed properly and ready to use!
Microsoft SQL Server Configuration
As of RetSoft 4.1, Retsoft Archive supports Microsoft SQL Server versions 2008, 2012, 2014, 2016 and 2017 (all editions except: Express / MSDE)
Installing Microsoft SQL Server:
- Start the installation process by running the setup file.
- Choose Installation: New SQL Server stand-alone installation or add features to an existing one. Proceed with installation.
- At the 'Feature Selection' screen, select 'Database Engine Services' and configure other parameters if required. Also select the 'Management Tools' checkbox.
- Optional: only for full-text indexing. Check The Full-Text Search checkbox. Press the 'Next' button.
- At the Screen 'Instance Configuration'. Leave it on 'Default instance' Press the 'Next' button.
- Server Configuration: [2008 only] On the 'Service Accounts' tab, choose 'NT AUTHORITY\SYSTEM' account. Make sure 'SQL Server Database Engine' and 'SQL Server Browser' are set to Automatic 'Startup Type'. At the 'Collation Setting' tab, no changes are required. Press the 'Next' button.
- At the 'Database Engine Configuration' screen, choose 'Mixed Mode' option. You have to set a password for the sa (System Administrator) account. Remember this password. Press the 'Next' Button.
- At the 'Error and usage report setting', no changes are required. Press the 'Next' button
Configuring for RetSoft Archive:
- Make sure the SQL server is running before proceeding (the 'SQL Server - Service manager' can be used to see if the server is running).
- Start SQL Server Management Studio.
- From the tree on the left, expand the 'Security' node. Right-click on the 'Logins' item. Right-click and choose 'New login'.
- Create the administrator user (without the quotes): 'scansort'; password: 'ssxprt'*. Fill in the user name, choose 'SQL Server Authentication' and submit the password.
- Leave default Database on 'master'.
- Uncheck the options 'Enforce password policy', 'Enforce password policy expiration' and 'User must change password at next login'.
The password policy forces users to use at least one number and one symbol, if preferred this can be left on. - From the tree on the left, select 'Server Roles'. Check the 'sysadmin' Server Role.
- Press the 'OK' button in order to apply the changes and complete the configuration.
* Password
Throughout the documentation we are using a fixed password for the user account ‘scansort’. You can change the password to your own needs. Be sure to remember the password if you decide to change it. It is required to log into ‘RetSoft Archive – Admin’.
Hardware installation
For the installation of your scanner please refer to its manual. Make sure you always have the latest drivers installed to avoid problems. The latest software for your scanner can be found on the website of the manufacturer.
RetSoft Archive® only works with scanners that work by the so-called 'TWAIN' standard. Almost all scanners for home use and (semi) professional use this standard.
Of course, scanners that do not come with a TWAIN driver, such as network scanners and copiers, can also be used simply by scanning into your inbox.
Archiving is done best with a professional scanner that scans 15 pages per minute or more.